iOS test automation is a valuable testing technique for ensuring the quality of your iOS apps and is the process of using automated scripts to test iOS apps. This can be done on real devices or on simulators.
There are many benefits to using iOS test automation, including:
Increased speed and efficiency: Automated tests can be run much faster than manual tests, which can save you a lot of time.
Improved accuracy: Automated tests are less error-prone than manual tests, which can help you ensure the quality of your app.
Reduced maintenance costs: Once you have created automated tests, you can reuse them for future releases of your app.
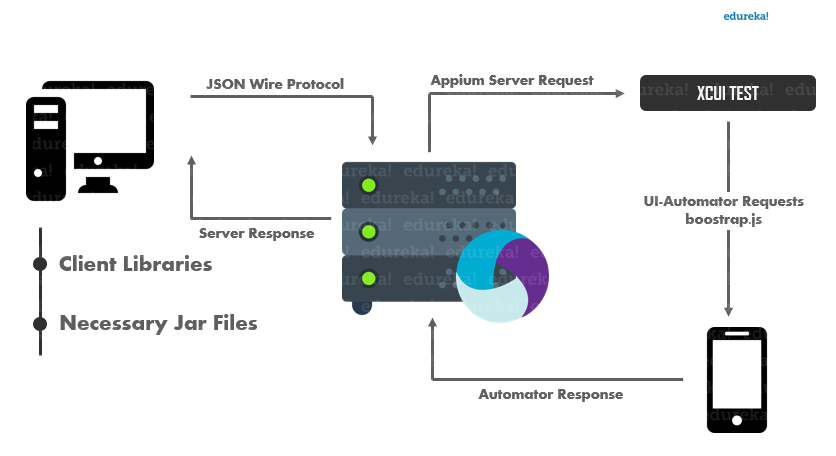
There are many different ways to set up iOS test automation, but Xcode and Appium are two popular options. In this blog post, I will show you how to set up iOS test automation using Xcode and Appium. I will also show you how to run automated tests on simulator devices. As, simulator devices are a great way to test your iOS apps on a variety of devices without having to purchase them all.
Prerequisites
1. Installing Node JS
Download and install Node JS depending on your operating system. To check the node version, use the following command on terminal:
node -v
2. Installing Java JDK and Setting up JAVA_HOME Environment Variable
Download and install Java JDK depending on your operating system . Open the terminal shell, and to return where was the SDK installed use the following command:
/usr/libexec/java_home
It should return something like this
If you want to check the java version you can use:
/usr/libexec/java_home -V
We can set the $JAVA_HOME environment variable in either ~/.zshenv or ~/.zshrc.
a. Open the ~/.zshenv
nano ~/.zshenv
b. Add the following content
export JAVA_HOME=$(/usr/libexec/java_home)
c. Source the file and print the $JAVA_HOME.
source ~/.zshenv
echo $JAVA_HOME
It should return something like this
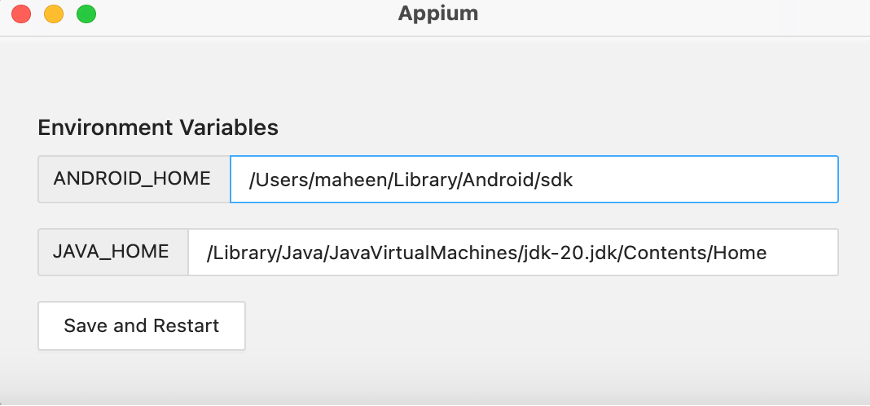
3. Setting Android_Home Environment Variable
a. Install Android studio on your device.
b. Open the zshenv file to insert the ANDROID_HOME variable:
nano ~/.zshenv
c. Add the following content
export ANDROID_HOME="/Users/[USER]/Library/Android/sdk"
export PATH=$ANDROID_HOME/platform-tools:$PATH
export PATH=$ANDROID_HOME/tools:$PATH
d. Source the file and print the $ANDROID_HOME.
source ~/.zshenv
echo $ANDROID_HOME
It should return something like this
e. With this configured, you can access the command Android Debug Bridge.
adb
4. iOS Setup
a. Install XCode from the macOS App Store. For this your macOS Ventura should be 13 or later.
b. Verify that you’ve successfully installed XCode Command Line Tools:
xcode-select -p
Executing this command should return something like:
c. Install Carthage (It is a simple dependency manager for macOS and iOS, created by a group of developers from GitHub).
brew install carthage
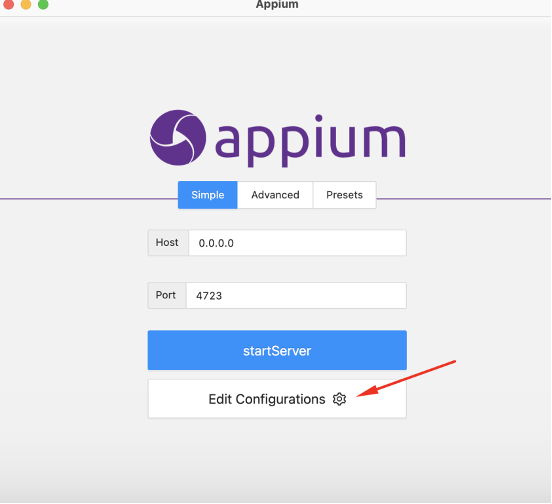
5. Appium Server GUI Setup
a. Install Appium GUI from github.
b. Run the following commands in the Terminal
npm install -g appium@next
c. Check the Appium version using
appium -v
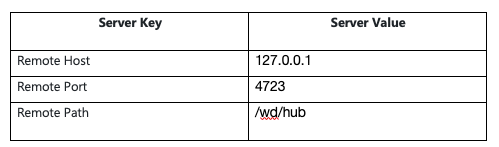
Now open the app, and set the following configurations
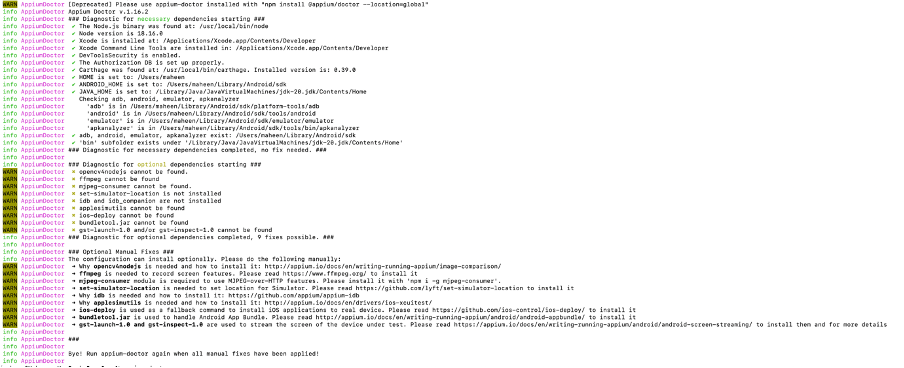
6. Appium Doctor
To check if your OS meets the Appium requirements, install this node (Appium Doctor Package) package.
Install it using the command
npm install appium-doctor -g
And then use the library:
appium-doctor
7. Appium Drivers
Now you need to download and have the iOS drivers in your system.
Run this command
appium driver install xcuitest
Check whether the driver is installed correctly by using following command:
appium driver list
8. Install idevice Installer
ideviceinstaller is an application that allows the iOS device to install, upgrade, uninstall, archive, restore and enumerate apps. It can be installed using
brew install ideviceinstaller
9. iOS Desired Capabilities [Simulator App]
Open finder and search for WebDriverAgent.xcodeproj.
Open WebDriverAgent.xcodeproj in Xcode.
Go to XCode and click on the settings.
In the Accounts tab, click + sign
Select Apple ID and click continue
Enter your Apple ID and password and click on Next.
Close the window after you've successfully added the Apple ID.
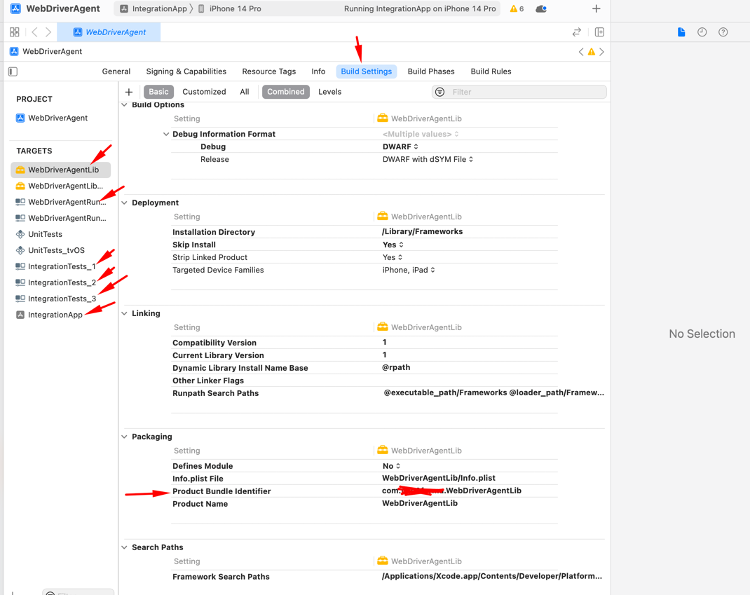
Now click on the WebDriverAgent Project and click on the “WebDriverAgentLib”.
Click on “Build Settings” and scroll down to “Packaging”.
In Packaging, rename the “Product Bundle Identifier” name to something unique “hms012”. So, it becomes like com.hms012.WebDriverAgentLib.
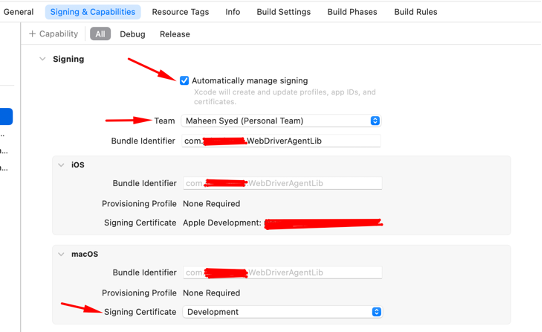
Now, click on “Signing&Capabilities”, select Automatically manage signing.
In team, select the name of your team that you created at Step 6.
Select Development in Signing Certificate. It’ll generate a signing certificate for you.
Now select “WebDriverAgentRunner”and repeat the steps from 9 to 13.
Note
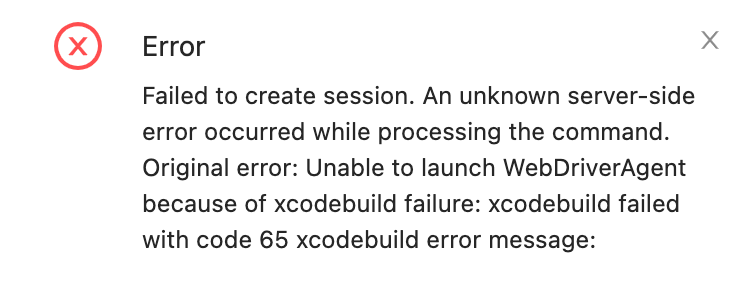
If you encounter error like
Then you need to change the string “hms012” to something else. It should be unique.
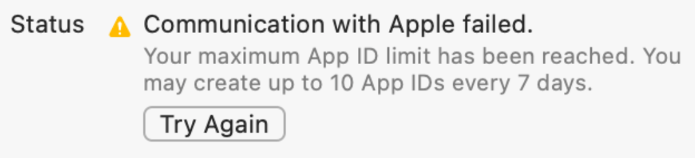
And if this error appears
then unfortunately you’ll have to wait till said days. This problem appears when you have a free developer account.
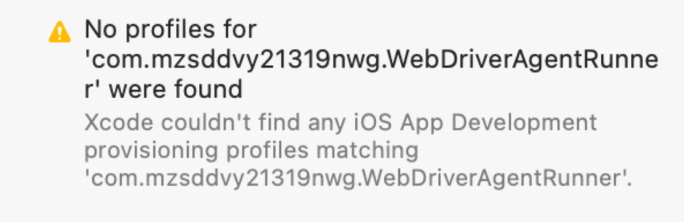
If you encounter this error “Xcode couldn’t find any iOS App Development provisioning profiles matching ‘com.hms012.WebDriverAgentRunner’.”
or errors like
Then follow these steps to solve it:
Check the signing and capabilities for webdriveragentrunner and webdriveragentlib, it should be signed in using a proper developer account.
Try running the tests again and check if the error isn’t there anymore. In case the same error still appears you need to do the next steps mentioned below.
. In such cases you can download the latest WebDriver Agent from ‘https://github.com/appium/WebDriverAgent/releases 30’
Then delete all files except Build folder from appium gui’s webdriver agent folder.
From the downloaded folder you can copy all files and paste inside the appium gui’s webdriver agent folder.
It should work!!
10. Appium Inspector Setup
Install Appium Inspector.
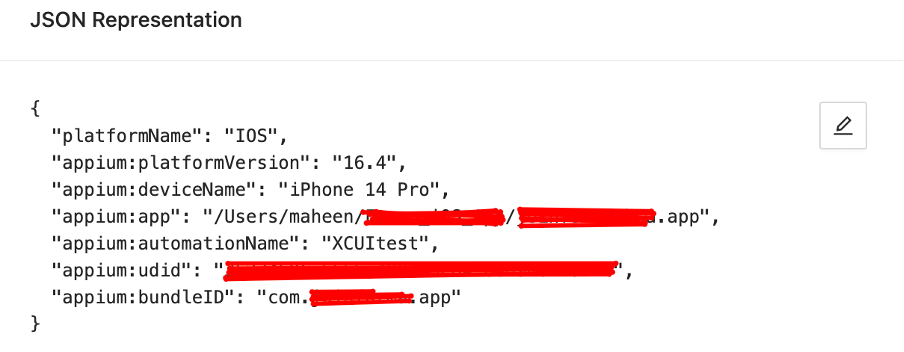
For setup, you can use the following configuration:
iOS Desired Capabilities (Simulator — App)
For “appium:app”, you need to ask your mobile developers for the “IPA” file of your app.
For “appium:udid”, you can either go to XCode. Click on your simulator and copy the “Identifier” path or you can run the following command in the terminal:
xcrun xctrace list devices
It will give you the list of emulators and their Identifier path.
Finally, start the Session.
Now I will configure the environment to run tests using WebDriverIO, and set up the Appium capabilities in the project.
11. Setup WebDriverIO
Run the command in the terminal to create the package.json & continue with the installation process
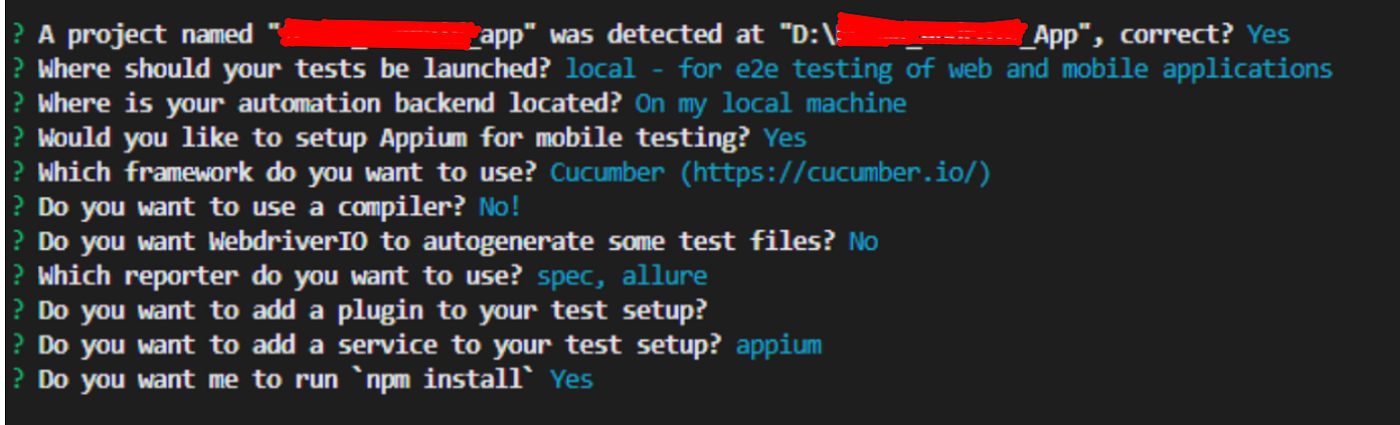
npm init wdio .
Using the WDIO Configuration Helper select the options you want to select. In my case I decided to use:
Install all the system requirements
npm install wdio
npm install webdriverio --save
npm i @wdio/cli
Install Appium in your project
npm install --save-dev appium@next
Check if the drivers are still available by using the following command:
appium driver list
If drivers are not available then install them again:
appium driver install xcuitest
Install Appium Server, Appium Plugin, and then run Appium Doctor using this command:
npx appium-installer
Add your feature files at
'./[yourProject]/features/**/*.feature'
Add your tests at
'./[yourProject]/specs/**/*.js'
Set up the capabilities for iOS(Emulator sample) at wdio.conf.js
capabilities: [{
platformName: 'iOS',
maxInstances: 1,
'appium:deviceName': 'iPhone 14 Pro',
'appium:platformVersion': '16.4',
'appium:automationName': 'XCUItest',
"appium:bundleID": "com.sampleapp.app",
"appium:udid": "sample ID of your Emulator app",
'appium:noReset': true,
"appium:waitforTimeout": 30000,
"appium:newCommandTimeout": 7200,
"appium:app": "iosAppPath"
}],
11. Run your scripts using
npx wdio
You should now be able to execute your tests.
I hope you find this blog helpful!! 🙂

![Setup iOS Test Automation Using WebDriverIO, XCode and Appium [Simulator Devices]](https://images.ctfassets.net/4c1ilau2zg2o/4FnO2fTIrYB9xOk8OU2Fyg/f832b3a2aef28a810ff2193f668fe849/setup-ios-test-thumbnail.jpg)